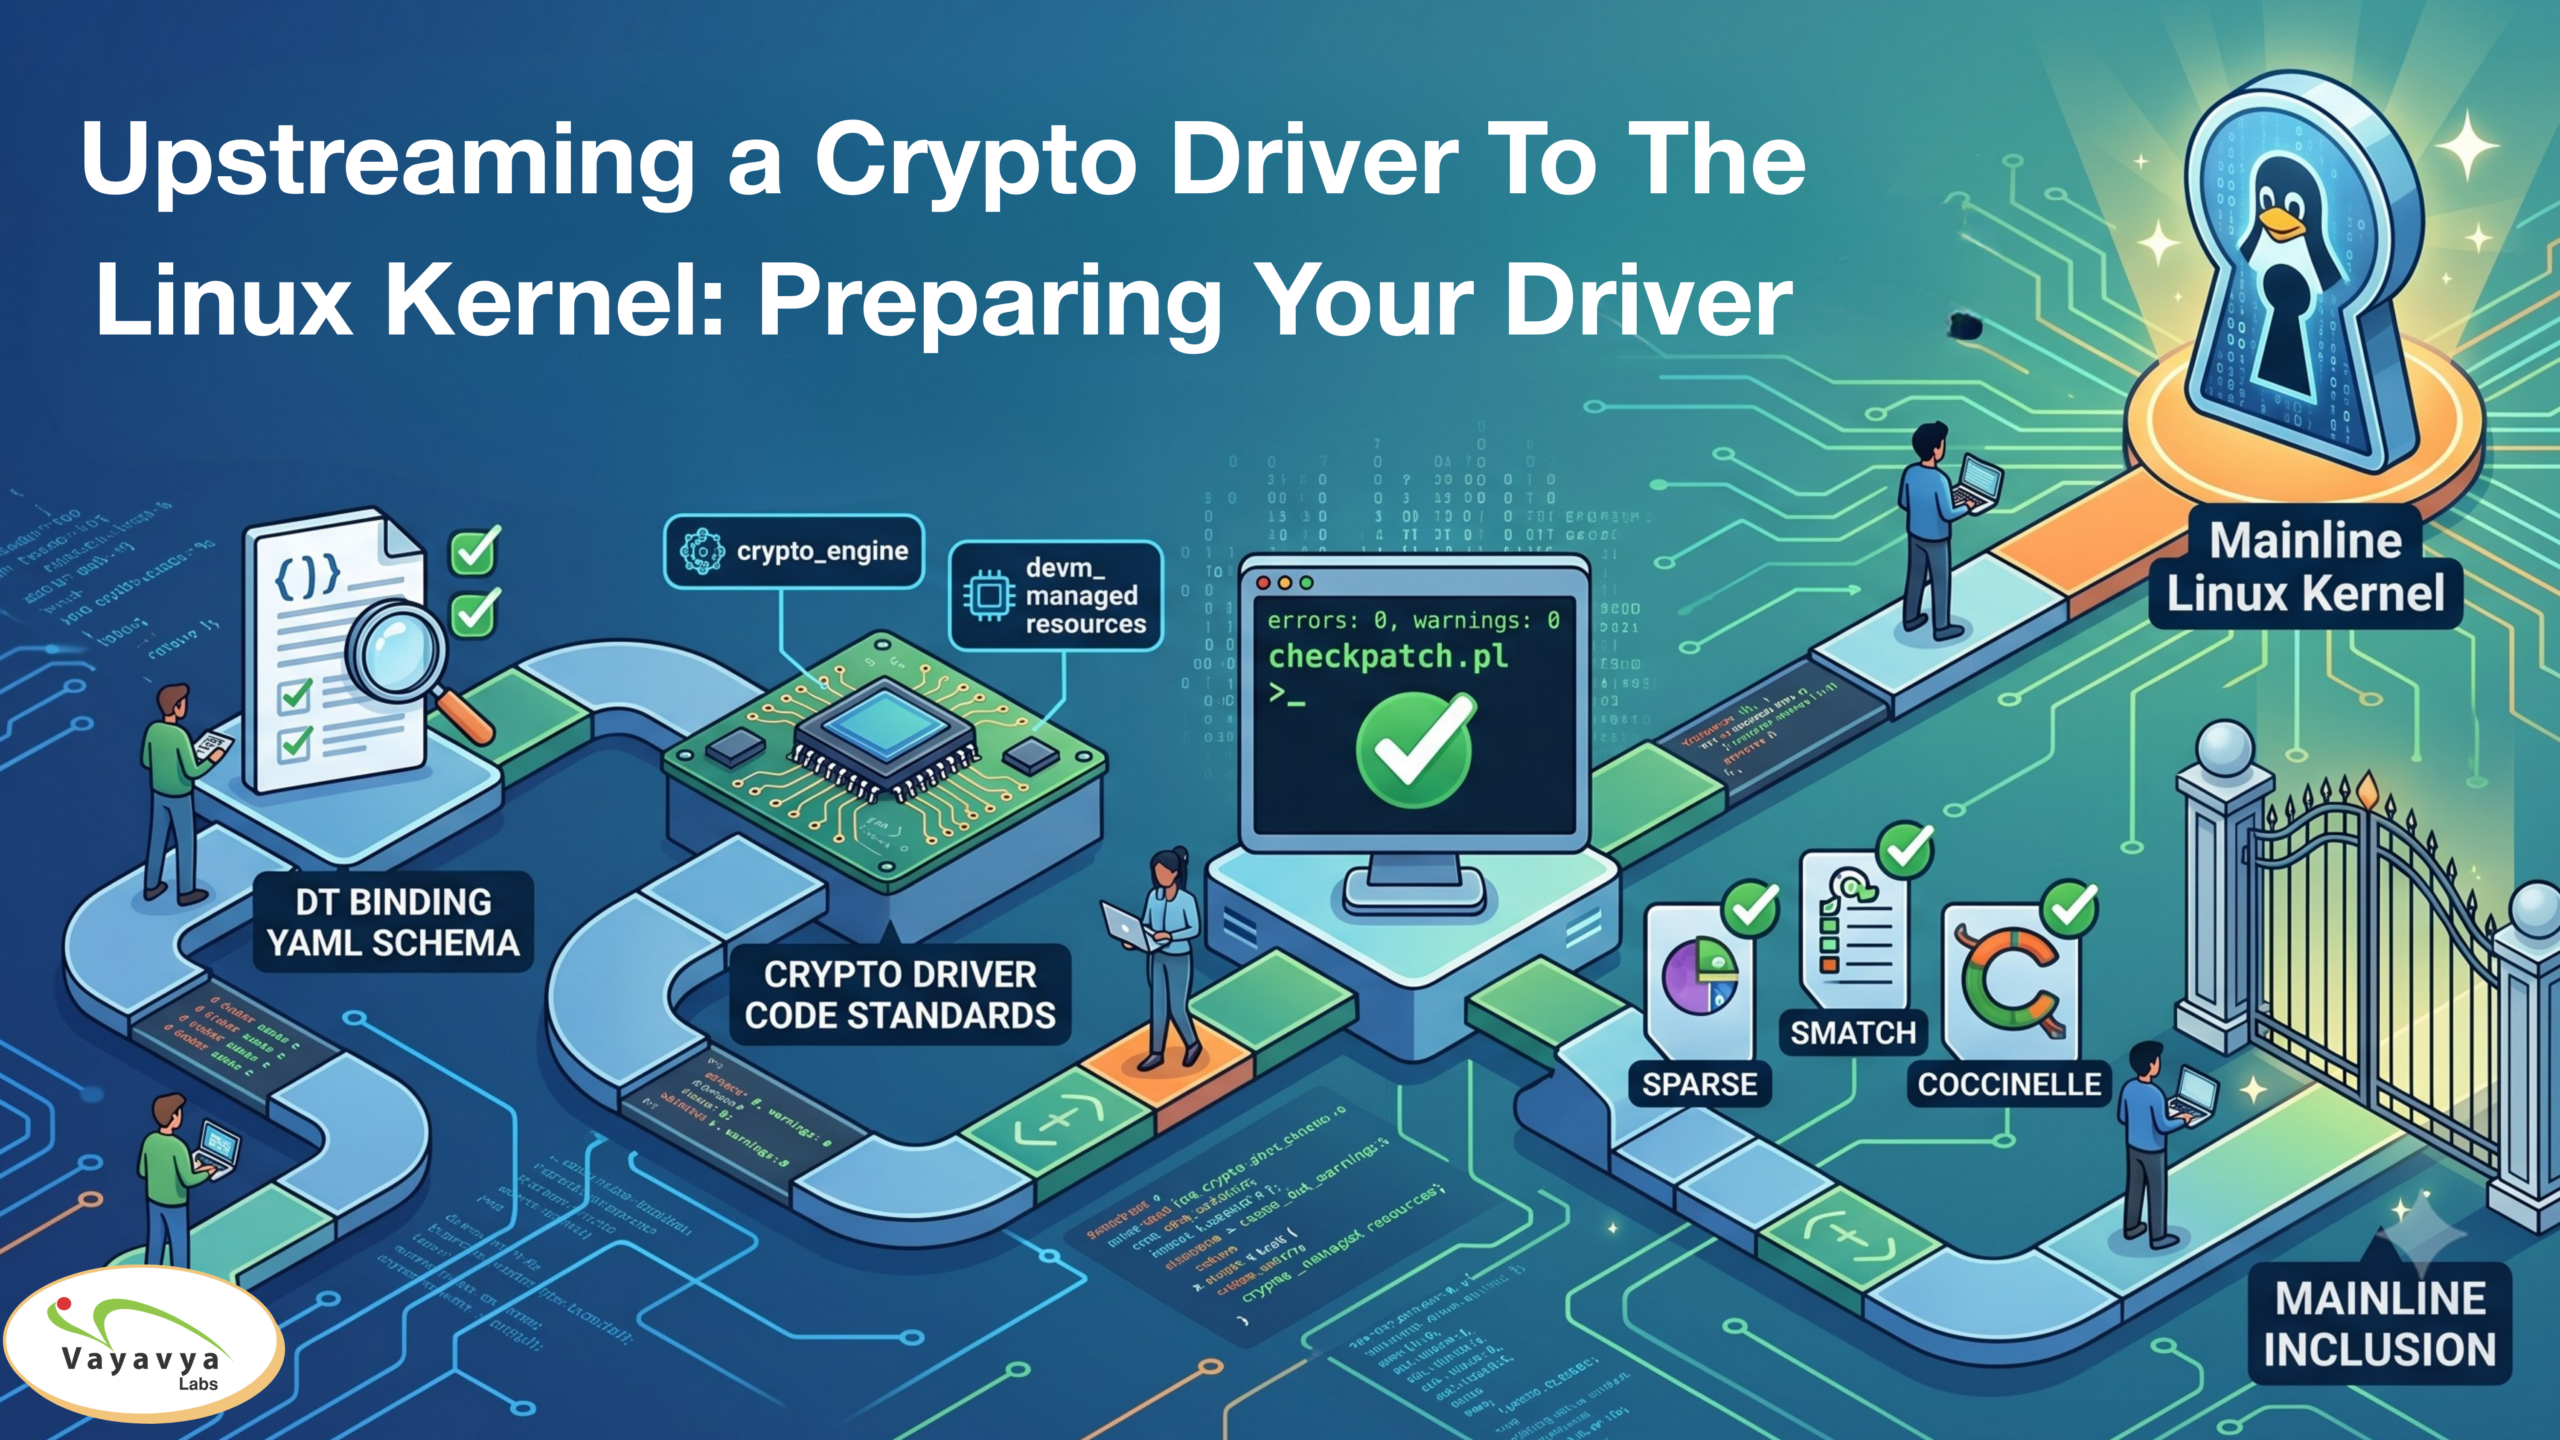
You’ve built a crypto driver for your hardware accelerator. It works, it’s tested, and it handles your engine’s SHA, AES, and AEAD operations correctly. Now what? If you keep it out-of-tree, you’ll fight every kernel upgrade, carry your own maintenance burden indefinitely, and get zero community review on security-critical code. Upstreaming is the answer — but it’s a process with real craft to it. This is Part 1 of a two-part series. Here, we focus entirely on the work you do before anyone else sees your code. Part 2 covers building and sending your patch series. And what happens after you hit SEND.
Introduction: Why Upstream?
Upstreaming means your driver becomes part of the official Linux kernel. Millions of users benefit. The community reviews it for security. You stop rebasing it forever. And frankly, it’s one of the most satisfying things you can do as a kernel developer.
This blog walks you through the entire process — from setting up your environment to tracking your patch on Patchwork — in the same detail you’d get from a senior maintainer sitting next to you.
Pre-requisites: Before You Write a Single Patch
1. Your Driver Must Be Kernel-Quality
The kernel community has high standards. Before you even think about sending patches:
- No compilation warnings with W=1 W=2 W=3 enabled
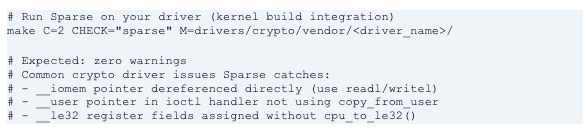
- No Sparse warnings (make C=2 CHECK=sparse M=your/driver/)
- No Smatch errors (error: severity, not warn:)
- No checkpatch.pl –strict errors
- Code follows Documentation/process/coding-style.rst exactly
- Uses kernel APIs correctly — no reinventing what already exists
- Driver compiles cleanly on at least arm, arm64, and x86_64

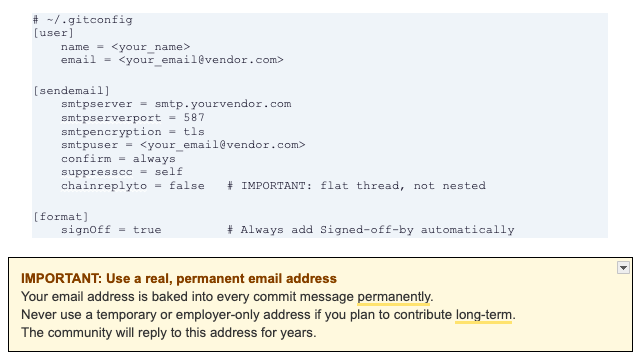
3. Git Configuration for Patch Sending
Your git config must be set up correctly. Patches are identified by author email, and your name appears in every commit permanently:
4. Subscribe to the Right Mailing Lists
Kernel development happens entirely on mailing lists. You must subscribe before you send anything — and you should lurk for a few weeks to understand the culture and pace.
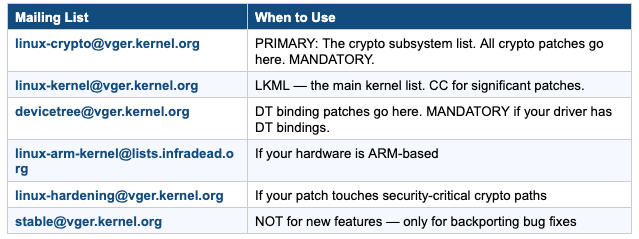
Subscribe via the web at https://vger.kernel.org/vger-lists.html — most lists use a simple email-based subscribe process. Send a blank email to majordomo@vger.kernel.org with body: subscribe linux-crypto.

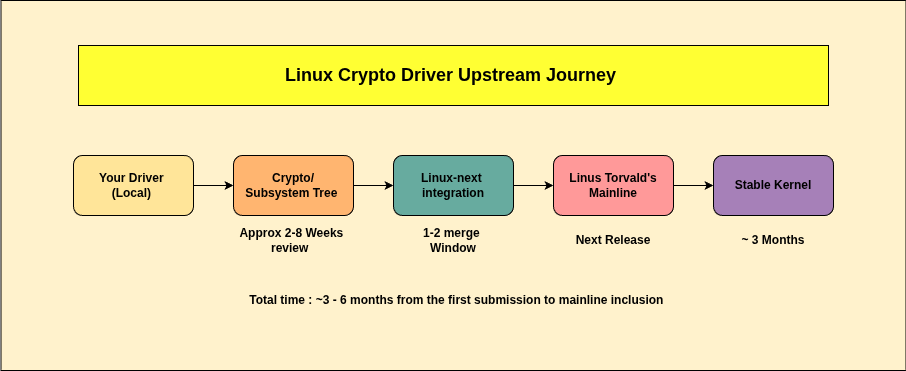
Understanding the Patch Series Structure
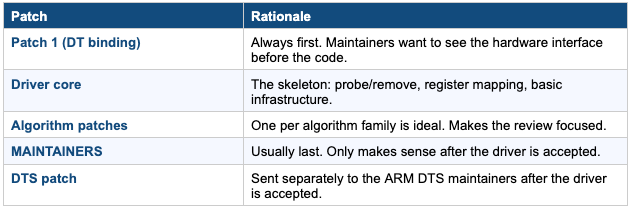
A crypto driver upstream submission is not one patch. It’s a patch series — typically 3 to 8 patches in a logical sequence. The order matters because each patch must compile and be valid on its own.
Typical Patch Order for a New Crypto Driver
- dt-bindings: crypto: vendor: Add <driver_name> binding documentation (YAML)
- crypto: vendor: Add <driver_name> driver core and register interface
- crypto: vendor: Add hash algorithm support (SHA-1, SHA-256, SHA-512)
- crypto: vendor: Add symmetric cipher support (AES-CBC, AES-ECB)
- crypto: vendor: Add AEAD support (AES-GCM, AES-CCM)
- MAINTAINERS: Add entry for vendor <driver_name> crypto driver
- arm64: dts: vendor: Enable <driver_name> in board DTS
Each patch is self-contained. If reviewers ask you to drop patch 4, the series should still be bisectable and compilable without it. Never put ‘this won’t compile without the next patch’ situations in your series.
Step 1: The DT Binding YAML Schema
Device Tree bindings document the hardware interface between firmware (DTS) and the driver. Since kernel v5.1, all new DT bindings must be in YAML format and validated against a JSON schema. This is non-negotiable for upstream.
Where the Files Live

Writing the YAML Binding File
Here is a complete, real-world DT binding YAML for a <driver_name>-style crypto accelerator:
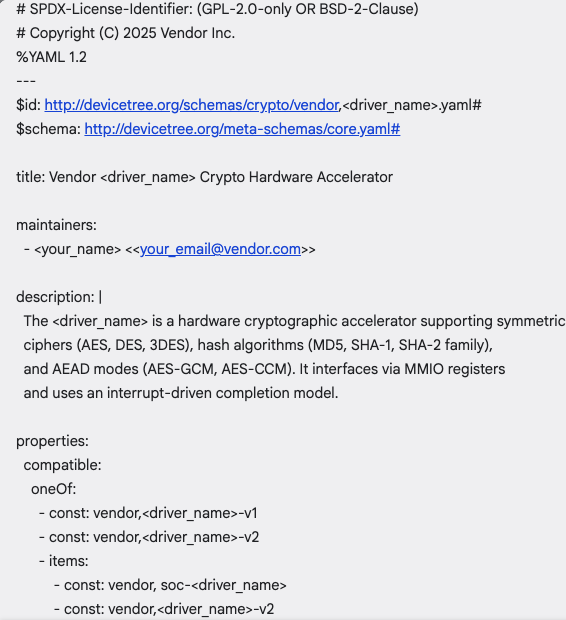
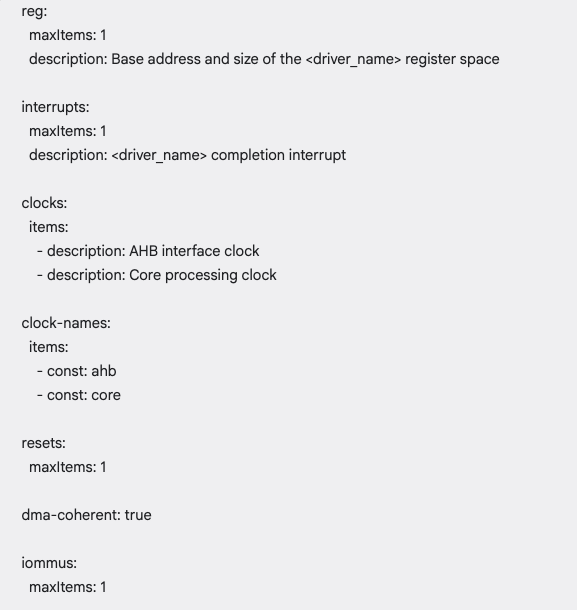
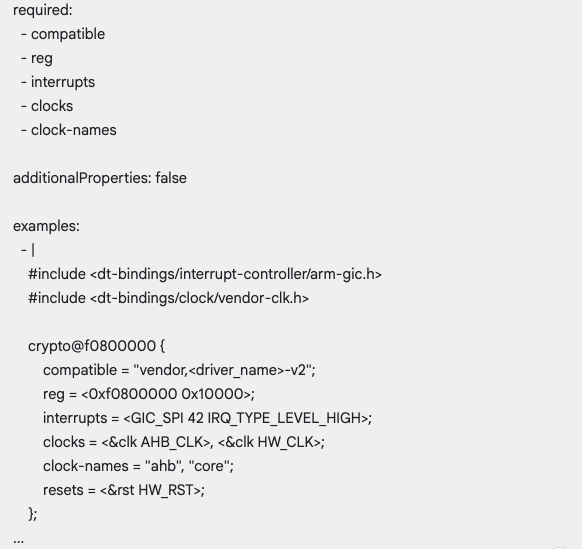
Figure 2: Structure of a DT binding YAML file for a crypto accelerator
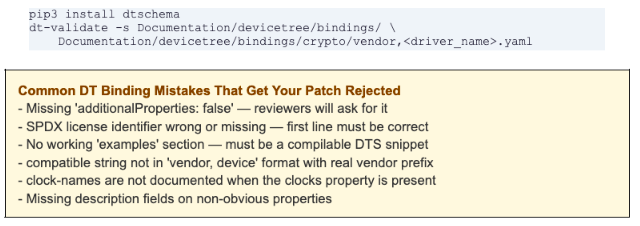
Validating the DT Binding
Before submitting, your YAML binding must pass all three validation steps:
Step 1: Schema lint check

Step 2: DTS example validation

Step 3: Full binding check with dtschema directly
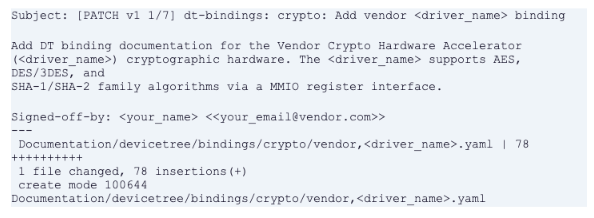
The DT Binding Patch Format
The DT binding is sent as a separate patch, usually patch 1/N in the series:
Step 2: Crypto Driver Code Standards
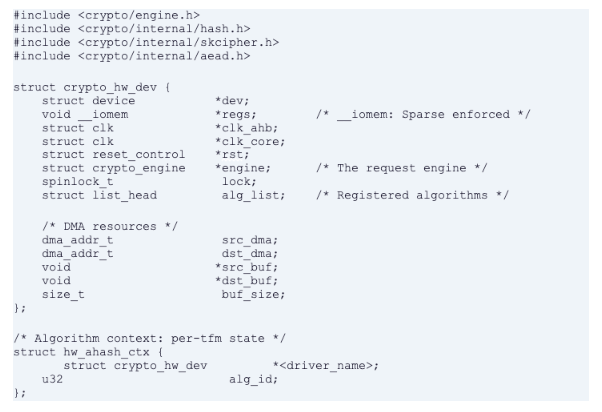
The crypto_engine Framework
Modern Linux crypto drivers must use the crypto_engine framework for request queuing and hardware serialization. Never implement your own request queue. The kernel already has a battle-tested one:
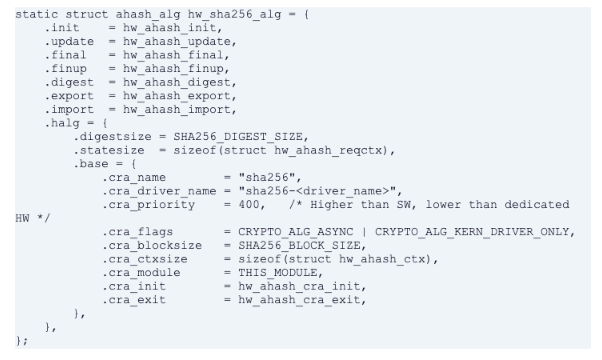
Algorithm Registration Pattern
Each algorithm is registered with its transform operations. Here is the pattern for ahash (async hash):
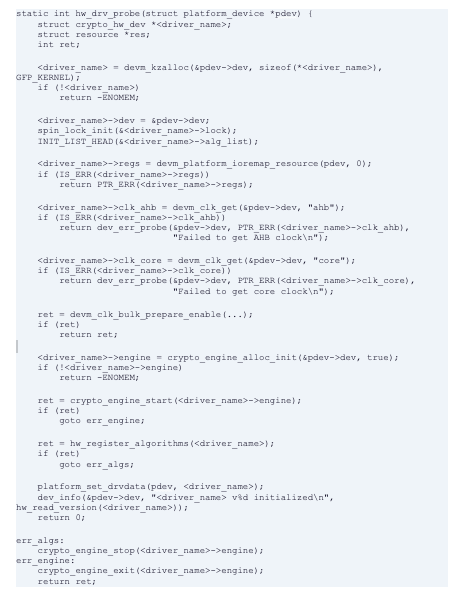
Probe and Remove Pattern
Use devm_ managed resources wherever possible. This dramatically simplifies error paths and eliminates a whole class of resource leak bugs:
Step 3: checkpatch.pl — Zero Tolerance
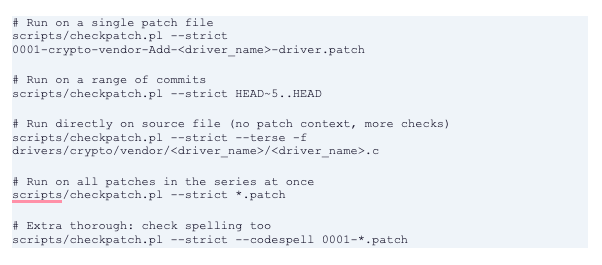
checkpatch.pl is the kernel community’s automated style checker. Reviewers will not look at a patch that fails checkpatch. Run it on every single patch before sending:
Running checkpatch
What Each Severity Level Means
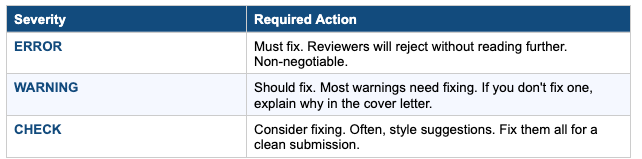
Common Checkpatch Errors and Fixes
ERROR: trailing whitespace

ERROR: code indent should use tabs not spaces
The kernel uses hard tabs (\t), not spaces for indentation. Configure your editor to insert tabs for C files.
WARNING: line over 80 characters
New code should aim for 80 chars. The limit is now 100 chars per Documentation/process/coding-style.rst, but staying under 80 is still preferred. Never go over 100.
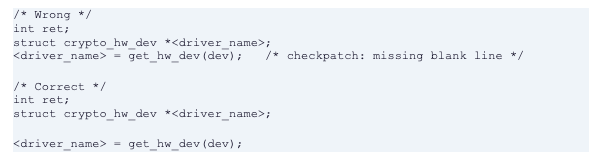
WARNING: Missing a blank line after declarations
CHECK: Prefer ‘unsigned int’ to bare ‘unsigned’

Step 4: Static Analysis — The Final Safety Net
Before sending any patch, all three static analysis tools must pass. This is not optional — crypto code is security-sensitive, and maintainers expect it to be clean.
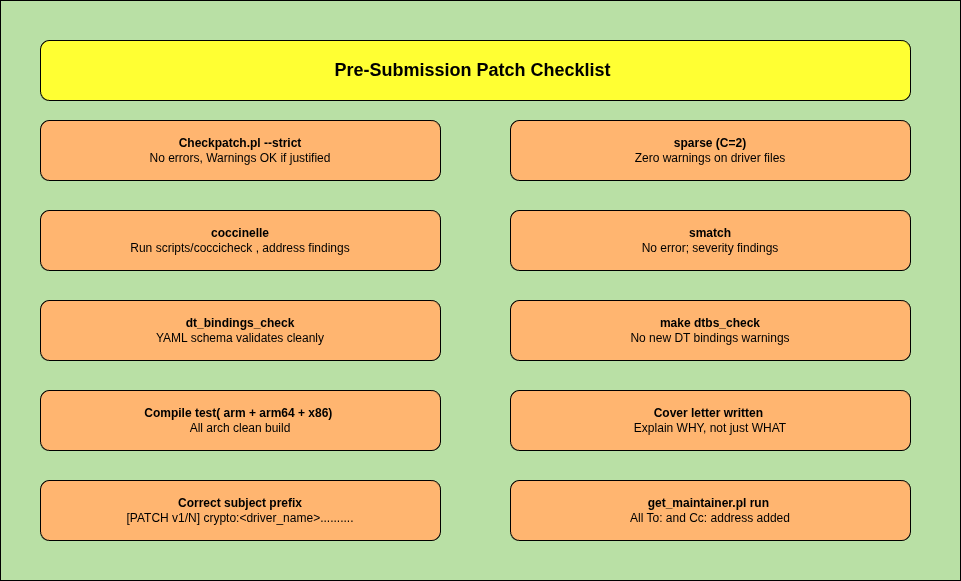
Figure 3: Pre-submission checklist — every item must be green before sending
Sparse — Run on Every Build
Coccinelle — Pattern Checks

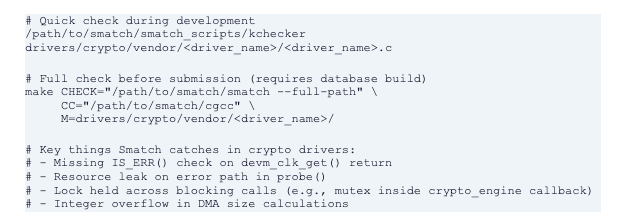
Smatch — Deep Analysis
Compile Test on Multiple Architectures
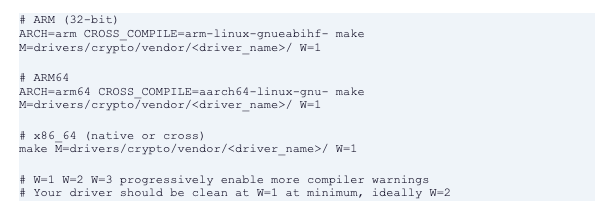
Your driver compiles cleanly on arm, arm64, and x86_64. Sparse is silent. Smatch has nothing to complain about. Checkpatch gives you zero errors. Your DT binding validates. This is the moment most developers underestimate — the hard, invisible work is actually done. But clean code sitting on your machine isn’t upstream.
In Part 2, we cover everything that comes next: packaging your work into a properly formatted patch series, writing a cover letter that gets read, finding the right maintainers, sending it to the mailing list, navigating review feedback, tracking your patch from the crypto subsystem tree through linux-next, and finally watching your driver land in Linus’s mainline.